49 - Cabinet Maker's Tool Chest, страница 11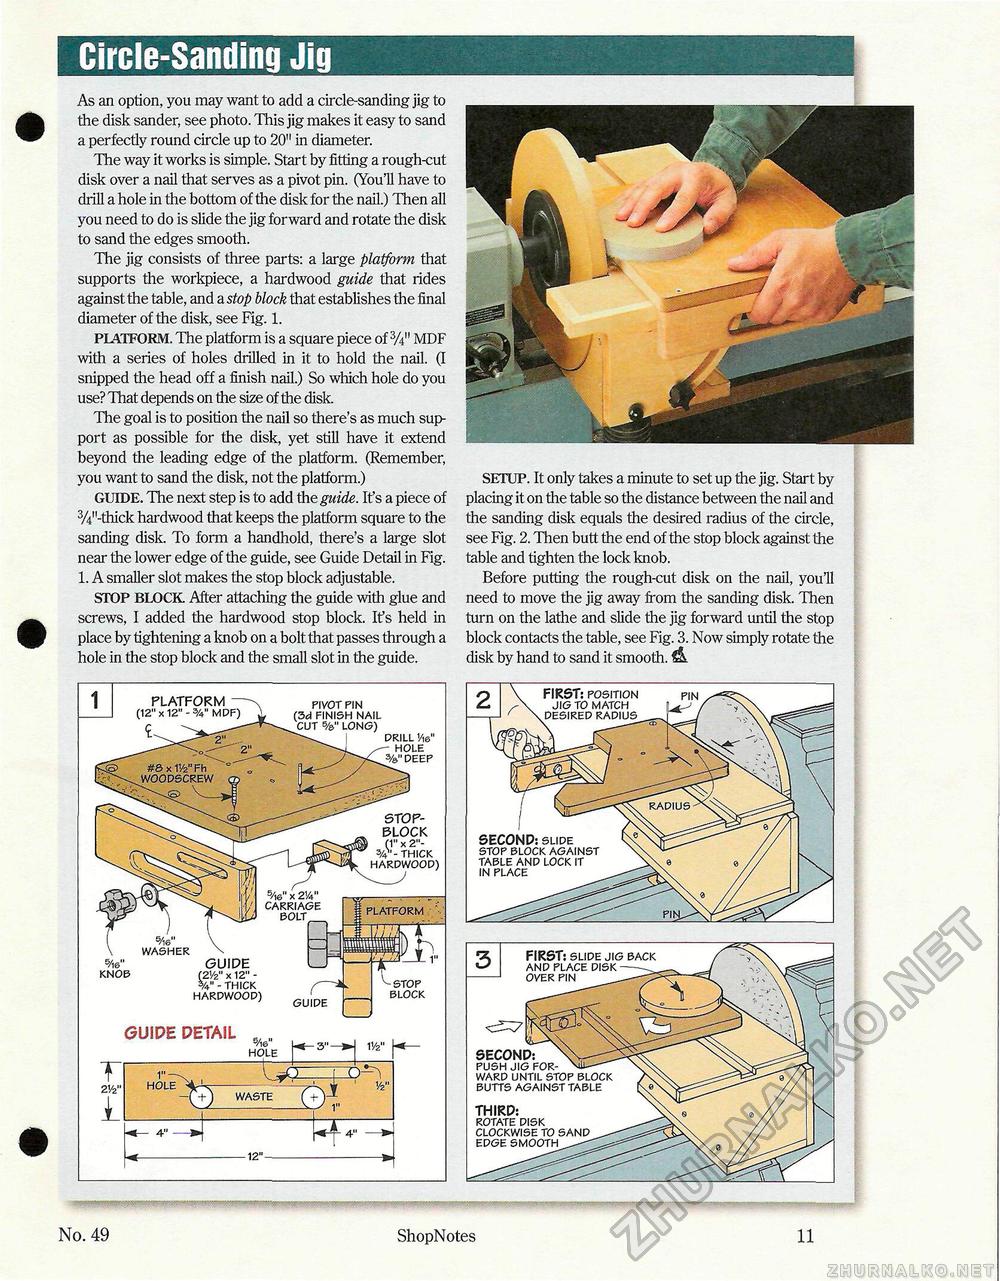
Circle-Sanding JigAs an option, you may want to add a circle-sanding jig to the disk sander, see photo. This jig makes it easy to sand a perfectly round circle up to 20" in diameter. The way it works is simple. Start by fitting a rough-cut disk over a nail that serves as a pivot pin. (You'll have to drill a hole in the bottom of the disk for the nail.) Then all you need to do is slide the jig forward and rotate the disk to sand the edges smooth. The jig consists of three parts: a large platform that supports the workpiece, a hardwood guide that rides against the table, and a stop block that establishes the final diameter of the disk, see Fig. 1. PLATFORM. The platform is a square piece of:MDF with a series of holes drilled in it to hold the nail. (I snipped the head off a finish nail.) So which hole do you use? That depends on the size of the disk. The goal is to position the nail so there's as much support as possible for the disk, yet still have it extend beyond the leading edge of the platform. (Remember, you want to sand the disk, not the platform.) GUIDE. The next step is to add the guide. It's a piece of 3/4M-thick hardwood that keeps the platform square to the sanding disk. To form a handhold, there's a large slot near the lower edge of the guide, see Guide Detail in Fig. 1. A smaller slot makes the stop block adjustable. STOP BLOCK After attaching the guide with glue and screws, I added the hardwood stop block. Ifs held in place by tightening a knob on a bolt that passes through a hole in the stop block and the small slot in the guide. SETUP. It only takes a minute to set up the jig. Start by placing it on the table so the distance between the nail and the sanding disk equals the desired radius of the circle, see Fig. 2. Then butt the end of the stop block against the table and tighten the lock knob. Before putting the rough-cut disk on the nail, you'll need to move the jig away from the sanding disk. Then turn on the lathe and slide the jig forward until the stop block contacts the table, see Fig. 3. Now simply rotate the disk by hand to sand it smooth. No. 49 ShopNotes 11 |


