49 - Cabinet Maker's Tool Chest, страница 12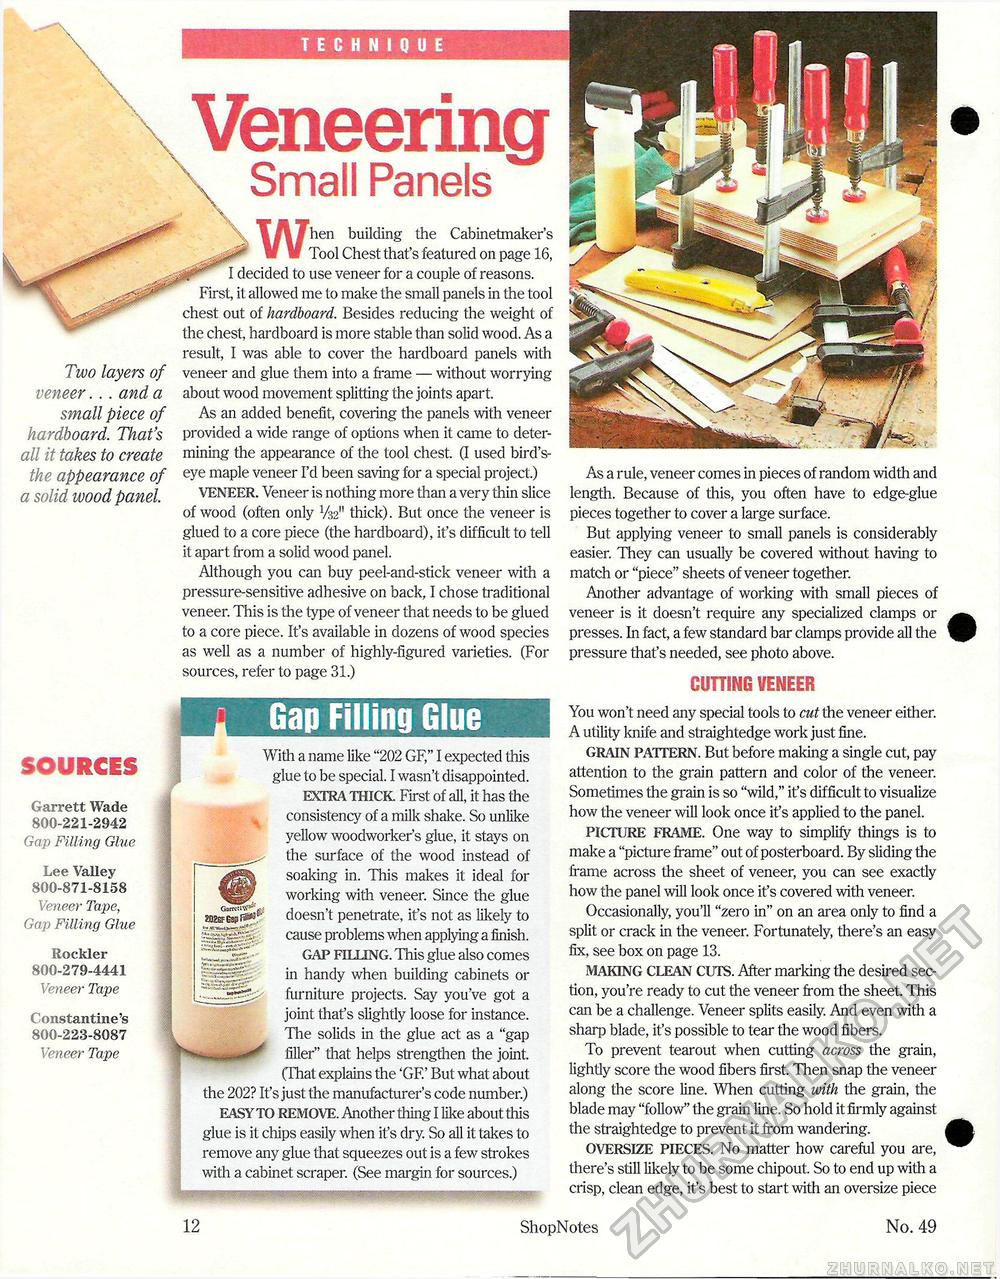
TECHNIQUE Veneering Small Panels Two layers of veneer. . . and a small piece of hardboard. That's all it takes to create the appearance of a solid wood panel SOURCES Garrett Wade 800-221-2942 Gap Filling Glue Lee Valley 800-871-8158 Veneer Tape, Gap Filling Glue Rockier 800-279-4441 Veneer Tape Constantine's 800-223-8087 Ven eer Tape hen building the Cabinetmaker's Tool Chest that's featured on page 16, decided to use veneer for a couple of reasons. First, it allowed me to make the small panels in the tool chest out of hardboard. Besides reducing the weight of the chest, hardboard is more stable than solid wood. As a result, I was able to cover the hardboard panels with veneer and glue them into a frame — without worrying about wood movement splitting the joints apart. As an added benefit, covering the panels with veneer provided a wide range of options when it came to determining the appearance of the tool chest. (I used bird's-eye maple veneer I'd been saving for a special project.) VENEER. Veneer is nothing more than a very thin slice of wood (often only thick). But once the veneer is glued to a core piece (the hardboard), it's difficult to tell it apart from a solid wood panel. Although you can buy peel-and-stick veneer with a pressure-sensitive adhesive on back, I chose traditional veneer. This is the type of veneer that needs to be glued to a core piece. It's available in dozens of wood species as well as a number of highly-figured varieties. (For sources, refer to page 31.) Gap Filling GlueWith a name like "202 GF," I expected this glue to be special. I wasn't disappointed. EXTRA THICK First of all, it has the consistency of a milk shake. So unlike yellow woodworker's glue, it stays on the surface of the wood instead of soaking in. This makes it ideal for working with veneer. Since the glue doesn't penetrate, it's not as likely to cause problems when applying a finish. GAP FILLING. This glue also comes in handy when building cabinets or furniture projects. Say you've got a joint that's slightly loose for instance. The solids in the glue act as a "gap filler" that helps strengthen the joint. (That explains the 'GF' But what about the 202? It's just the manufacturer's code number.) EASY TO REMOVE. Another thing I like about this glue is it chips easily when it's dry. So all it takes to remove any glue that squeezes out is a few strokes with a cabinet scraper. (See margin for sources.) MIISRS^BSilSSWHSI As a rule, veneer comes in pieces of random width and length. Because of this, you often have to edge-glue pieces together to cover a large surface. But applying veneer to small panels is considerably easier. They can usually be covered without having to match or "piece" sheets of veneer together. Another advantage of working with small pieces of veneer is it doesn't require any specialized clamps or presses. In fact, a few standard bar clamps provide all the pressure that's needed, see photo above. CUTTING VENEER You won't need any special tools to cut the veneer either. A utility knife and straightedge work just fine. GRAIN PATTERN. But before making a single cut, pay attention to the grain pattern and color of the veneer. Sometimes the grain is so "wild," it's difficult to visualize how the veneer will look once it's applied to the panel. PICTURE FRAME. One way to simplify things is to make a "picture frame" out of posterboard. By sliding the frame across the sheet of veneer, you can see exactly how the panel will look once it's covered with veneer. Occasionally, you'll "zero in" on an area only to find a split or crack in the veneer. Fortunately, there's an easy fix, see box on page 13. MAKING CLEAN CUTS. After marking the desired section, you're ready to cut the veneer from the sheet. This can be a challenge. Veneer splits easily. And even with a sharp blade, it's possible to tear the wood fibers. To prevent tearout when cutting across the grain, lightly score the wood fibers first. Then snap the veneer along the score line. When cutting with the grain, the blade may "follow" the grain line. So hold it firmly against the straightedge to prevent it from wandering. OVERSIZE PIECES. No matter how careful you are, there's still likely to be some chipout. So to end up with a crisp, clean edge, it's best to start with an oversize piece 12 ShopNotes No. 49 |


