50 - Table Saw Workstation, страница 20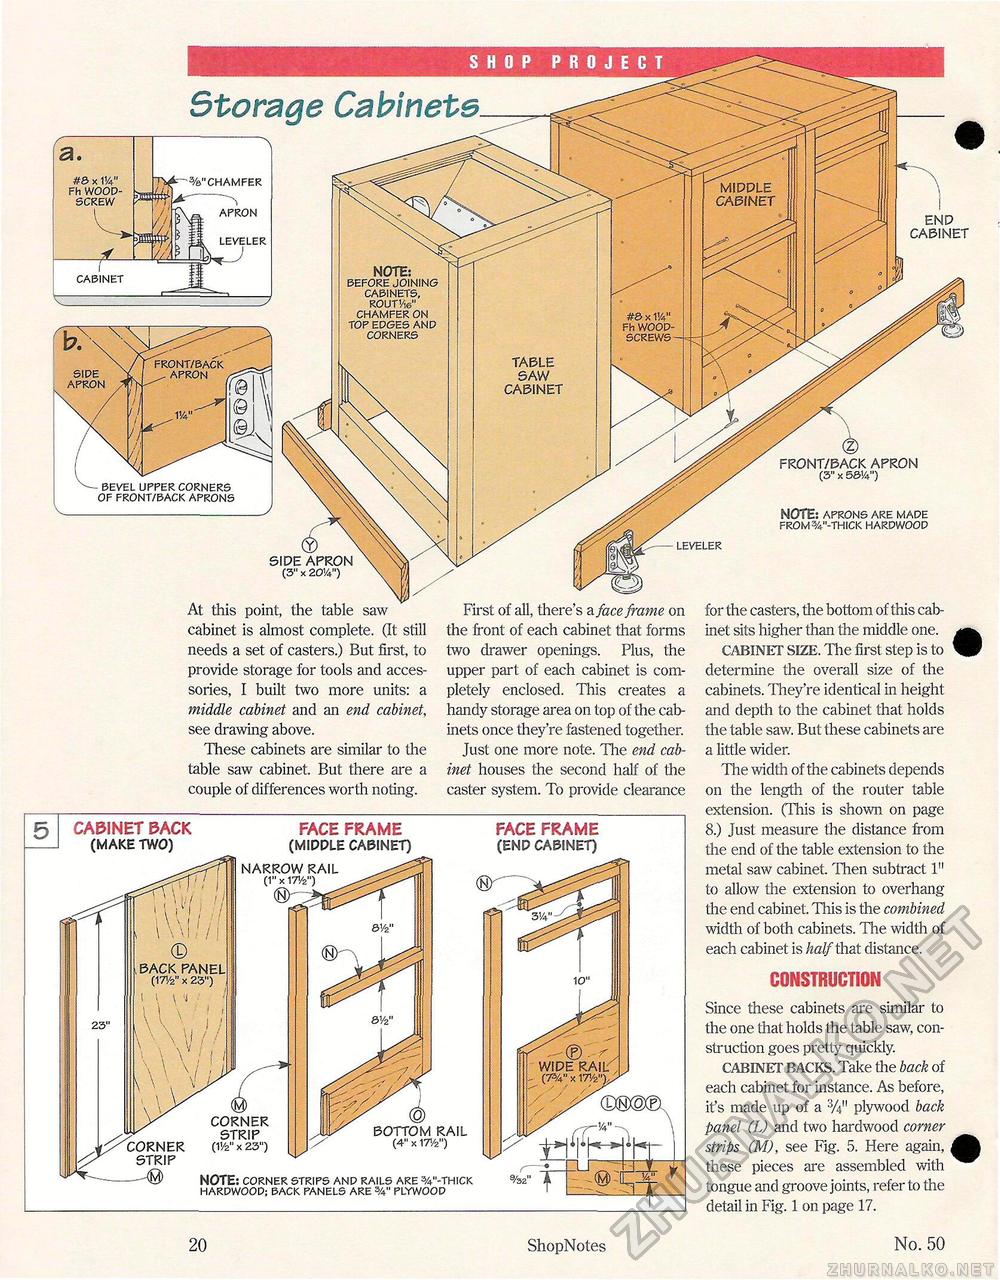
SHOP PROJECT Storage Cabinets #8 x 1!4" Fh WOOD SCREW FRONT/BACK APRON (3" x 53V4") NOTE; aprons are made from %"-thick hardwood At this point, the table saw cabinet is almost complete. (It still needs a set of casters.) But first, to provide storage for tools and accessories, I built two more units: a middle cabinet and an end cabinet, see drawing above. These cabinets are similar to the table saw cabinet. But there are a couple of differences worth noting. First of all, there's a face frame on the front of each cabinet that forms two drawer openings. Plus, the upper part of each cabinet is completely enclosed. This creates a handy storage area on top of the cabinets once they're fastened together. Just one more note. The end cabinet houses the second half of the caster system. To provide clearance CABINET BACK (MAKE TWO) FACE FRAME (MIDDLE CABINET) FACE FRAME (END CABINET) NARROW RAIL (1" x 17Vz") (8)-r<2 <0 CORNER STRIP (IV2" x 23") <sr fOt @ BOTTOM RAIL (4" x 171/2") NOTE: corner strips and rails are w-thick hardwood; back panels are %" plywood for the casters, the bottom of this cabinet sits higher than the middle one. CABINET SIZE. The first step is to determine the overall size of the cabinets. They're identical in height and depth to the cabinet that holds the table saw. But these cabinets are a little wider. The width of the cabinets depends on the length of the router table extension. (This is shown on page 8.) Just measure the distance from the end of the table extension to the metal saw cabinet. Then subtract 1" to allow the extension to overhang the end cabinet. This is the combined width of both cabinets. The width of each cabinet is half that distance. CONSTRUCTION Since these cabinets are similar to the one that holds the table saw, construction goes pretty quickly. CABINET BACKS. Take the back of each cabinet for instance. As before, it's made up of a 'W plywood back panel (L) and two hardwood comer strips (M), see Fig. 5. Here again, these pieces are assembled with tongue and groove joints, refer to the detail in Fig. 1 on page 17. 20 ShopNotes No. 50 |


