50 - Table Saw Workstation, страница 26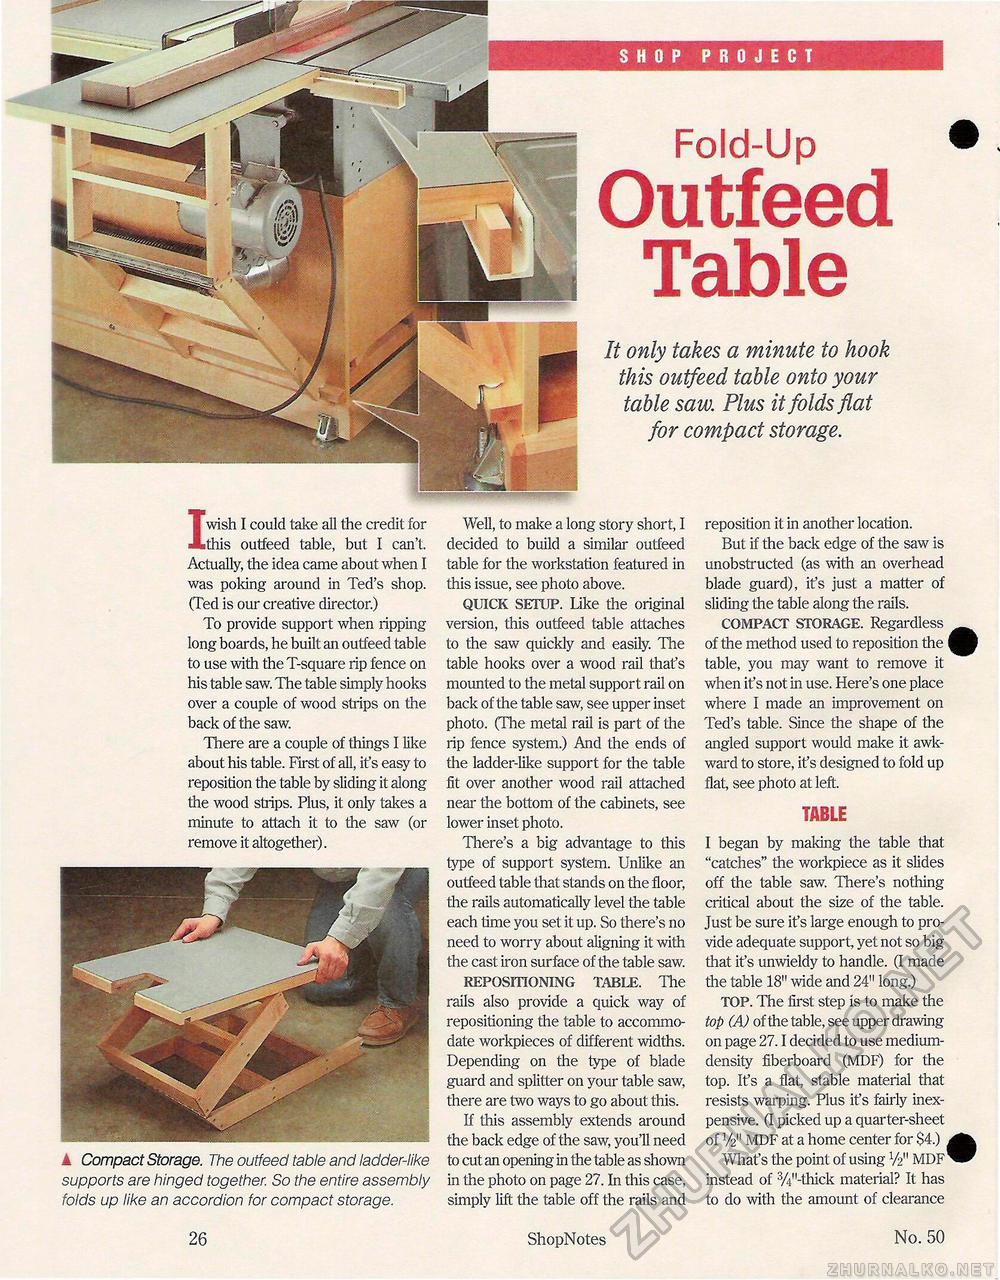
SHOP PROJECT Fold-Up Outfeed Table It only takes a minute to hook this outfeed table onto your table saw. Plus it folds flat for compact storage. Iwish I could take all the credit for this outfeed table, but I can't. Actually, the idea came about when I was poking around in Ted's shop. (Ted is our creative director.) To provide support when ripping long boards, he built an outfeed table to use with the T-square rip fence on his table saw. The table simply hooks over a couple of wood strips on the back of the saw. There are a couple of things I like about his table. First of all, if s easy to reposition the table by sliding it along the wood strips. Plus, it only takes a minute to attach it to the saw (or remove it altogether). ▲ Compact Storage. The outfeed table and ladder-like supports are hinged together. So the entire assembly folds up like an accordion for compact storage. Well, to make a long story short, I decided to build a similar outfeed table for the workstation featured in this issue, see photo above. QUICK SETUP. Like the original version, this outfeed table attaches to the saw quickly and easily. The table hooks over a wood rail that's mounted to the metal support rail on back of the table saw, see upper inset photo. (The metal rail is part of the rip fence system.) And the ends of the ladder-like support for the table fit over another wood rail attached near the bottom of the cabinets, see lower inset photo. There's a big advantage to this type of support system. Unlike an outfeed table that stands on the floor, the rails automatically level the table each time you set it up. So there's no need to worry about aligning it with the cast iron surface of the table saw. REPOSITIONING TABLE. The rails also provide a quick way of repositioning the table to accommodate workpieces of different widths. Depending on the type of blade guard and splitter on your table saw, there are two ways to go about this. If this assembly extends around the back edge of the saw, you'll need to cut an opening in the table as shown in the photo on page 27. In this case, simply lift the table off the rails and reposition it in another location. But if the back edge of the saw is unobstructed (as with an overhead blade guard), it's just a matter of sliding the table along the rails. COMPACT STORAGE. Regardless of the method used to reposition the I table, you may want to remove it when it's not in use. Here's one place where I made an improvement on Ted's table. Since the shape of the angled support would make it awkward to store, it's designed to fold up flat, see photo at left. TABLE I began by maldng the table that "catches" the workpiece as it slides off the table saw. There's nothing critical about the size of the table. Just be sure it's large enough to provide adequate support, yet not so big that it's unwieldy to handle. (I made the table 18" wide and 24" long.) TOP. The first step is to make the top (A) of the table, see upper drawing on page 27.1 decided to use medium-density fiberboard (MDF) for the top. It's a flat, stable material that resists warping. Plus it's fairly inexpensive. (I picked up a quarter-sheet of V21' MDF at a home center for $4.) What's the point of using V2" MDF' instead of 3/4"-thick material? It has to do with the amount of clearance 26 ShopNotes No. 50 |


