65 - Our Best Bench Yet, страница 22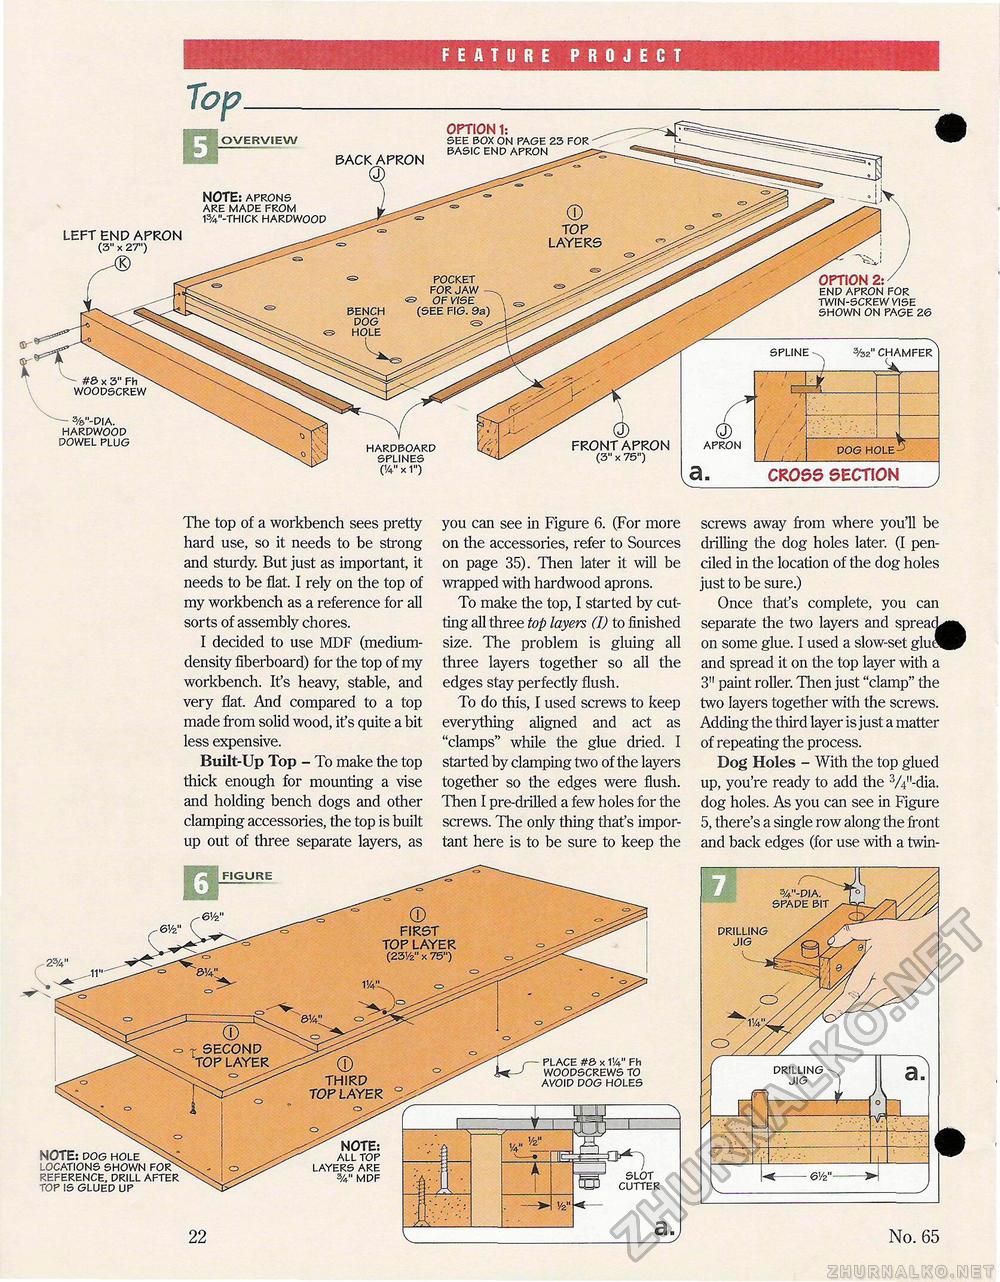
FEATURE PROJECT bench dog & hole hardboard splines OVERVIEW NOTE: aprons are made from w-thick hardwood BACK APRON OPTION 1: see box on page 23 for basic end apron LEFT END APRON (3" x 27") spline woodscrew (V x 1") OPTION 2-y end apron for twin-screw vise shown on page 26 %z" chamfer 3/6"-dia. hardwood dowel plug \ Q) FRONT APRON (3" x 75") spline %z" chamfer
CROSS SECTION The top of a workbench sees pretty hard use, so it needs to be strong and sturdy. But just as important, it needs to be flat. I rely on the top of my workbench as a reference for all sorts of assembly chores. I decided to use MDF (medium-density fiberboard) for the top of my workbench. It's heavy, stable, and very flat. And compared to a top made from solid wood, it's quite a bit less expensive. Built-Up Top - To make the top thick enough for mounting a vise and holding bench dogs and other clamping accessories, the top is built up out of three separate layers, as you can see in Figure 6. (For more on the accessories, refer to Sources on page 35). Then later it will be wrapped with hardwood aprons. To make the top, I started by cutting all three top layers (I) to finished size. The problem is gluing all three layers together so all the edges stay perfectly flush. To do this, I used screws to keep everything aligned and act as "clamps" while the glue dried. I started by clamping two of the layers together so the edges were flush. Then I pre-drilled a few holes for the screws. The only thing that's important here is to be sure to keep the screws away from where you'll be drilling the dog holes later. (I penciled in the location of the dog holes just to be sure.) Once that's complete, you can separate the two layers and spreai on some glue. I used a slow-set glu and spread it on the top layer with a 3" paint roller. Then just "clamp" the two layers together with the screws. Adding the third layer is just a matter of repeating the process. Dog Holes - With the top glued up, you're ready to add the 3/4"-dia. dog holes. As you can see in Figure 5, there's a single row along the front and back edges (for use with a twin- m No. 65 NOTE: all top layers are za" mdf FIGURE place #& x VA" fh woodscrews to avoid dog holes cutter NOTE: dog hole locations shown reference, drill after top is glued up %"-dia. spade bit drilling jig drilling jig |
||||||||||||||


