88, страница 22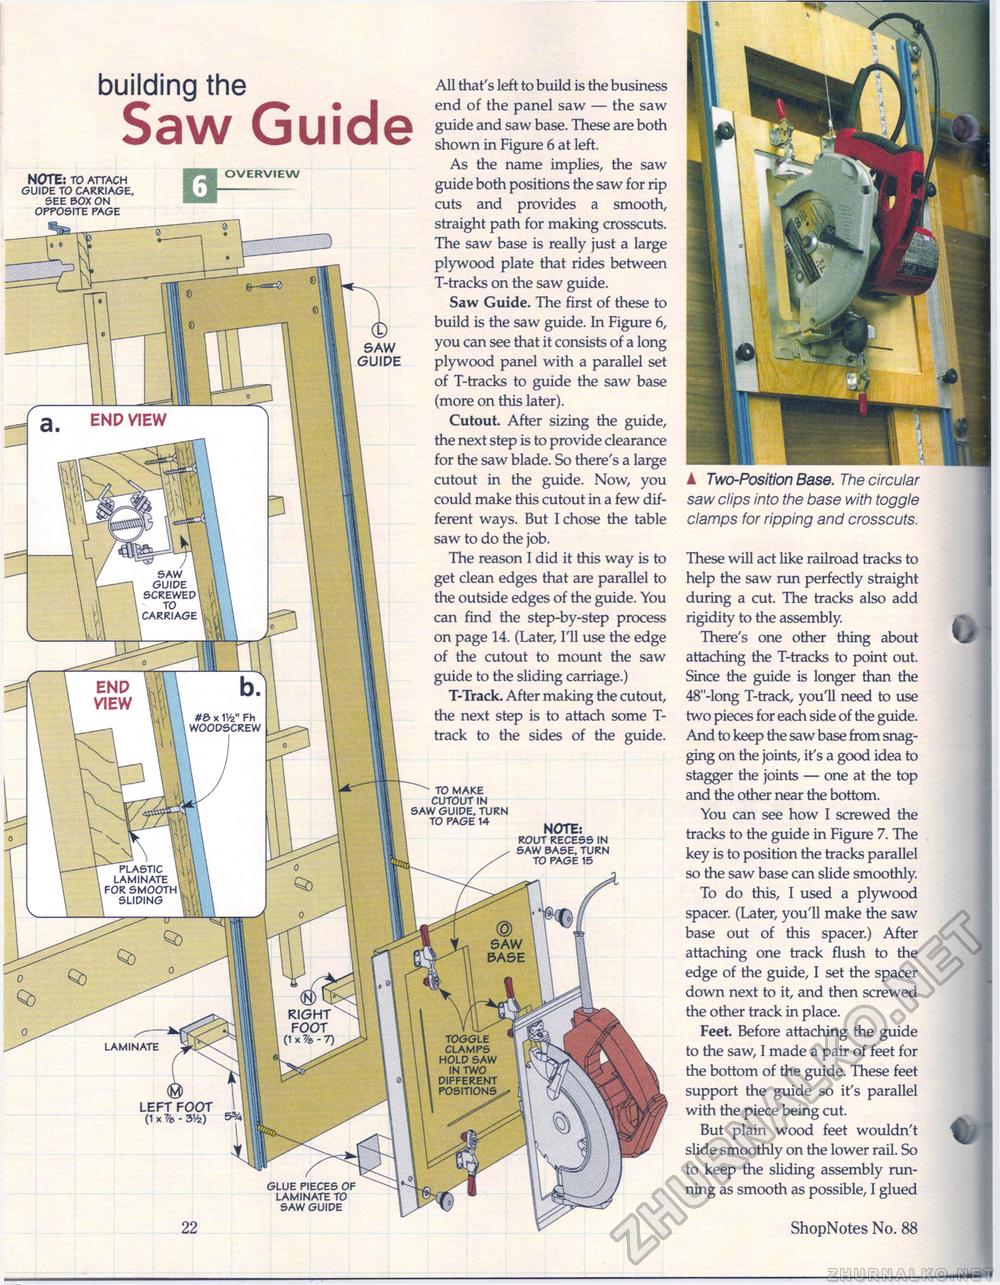
saw \ guide \ screwed' TO carriage #& x 11/2" Fh woodscrew plastic \ laminate for smooth sliding RIGHT FOOT (1 X % - 7) toggle clamps hold saw in two different positions laminate All that's left to build is the business end of the panel saw — the saw guide and saw base. These are both shown in Figure 6 at left. As the name implies, the saw guide both positions the saw for rip cuts and provides a smooth, straight path for making crosscuts. The saw base is really just a large plywood plate that rides between T-tracks on the saw guide. Saw Guide. The first of these to build is the saw guide. In Figure 6, you can see that it consists of a long plywood panel with a parallel set of T-tracks to guide the saw base (more on this later). Cutout. After sizing the guide, the next step is to provide clearance for the saw blade. So there's a large cutout in the guide. Now, you could make this cutout in a few different ways. But I chose the table saw to do the job. The reason I did it this way is to get clean edges that are parallel to the outside edges of the guide. You can find the step-by-step process on page 14. (Later, I'll use the edge of the cutout to mount the saw guide to the sliding carriage.) T-Track. After making the cutout, the next step is to attach some T-track to the sides of the guide. glue pieces of laminate to saw guide building the Saw Guide LEFT FOOT (1 x % - y/z) SAW GUIDE ^ to make cutout in saw guide, turn to page 14 NOTE: rout recess in saw base, turn to page 15 END VIEW NOTE: to attach guide to carriage, see box on opposite page ▲ Two-Position Base. The circular saw clips into the base with toggle clamps for ripping and crosscuts. These will act like railroad tracks to help the saw run perfectly straight during a cut. The tracks also add rigidity to the assembly. There's one other thing about attaching the T-tracks to point out. Since the guide is longer than the 48"-long T-track, you'll need to use two pieces for each side of the guide. And to keep the saw base from snagging on the joints, it's a good idea to stagger the joints — one at the top and the other near the bottom. You can see how I screwed the tracks to the guide in Figure 7. The key is to position the tracks parallel so the saw base can slide smoothly. To do this, I used a plywood spacer. (Later, you'll make the saw base out of this spacer.) After attaching one track flush to the edge of the guide, I set the spacer down next to it, and then screwed the other track in place. Feet. Before attaching the guide to the saw, I made a pair of feet for the bottom of the guide. These feet support the guide so it's parallel with the piece being cut. But plain wood feet wouldn't slide smoothly on the lower rail. So to keep the sliding assembly running as smooth as possible, I glued 22 ShopNotes No. 88 |


