Woodworker's Journal 1994-18-1, страница 65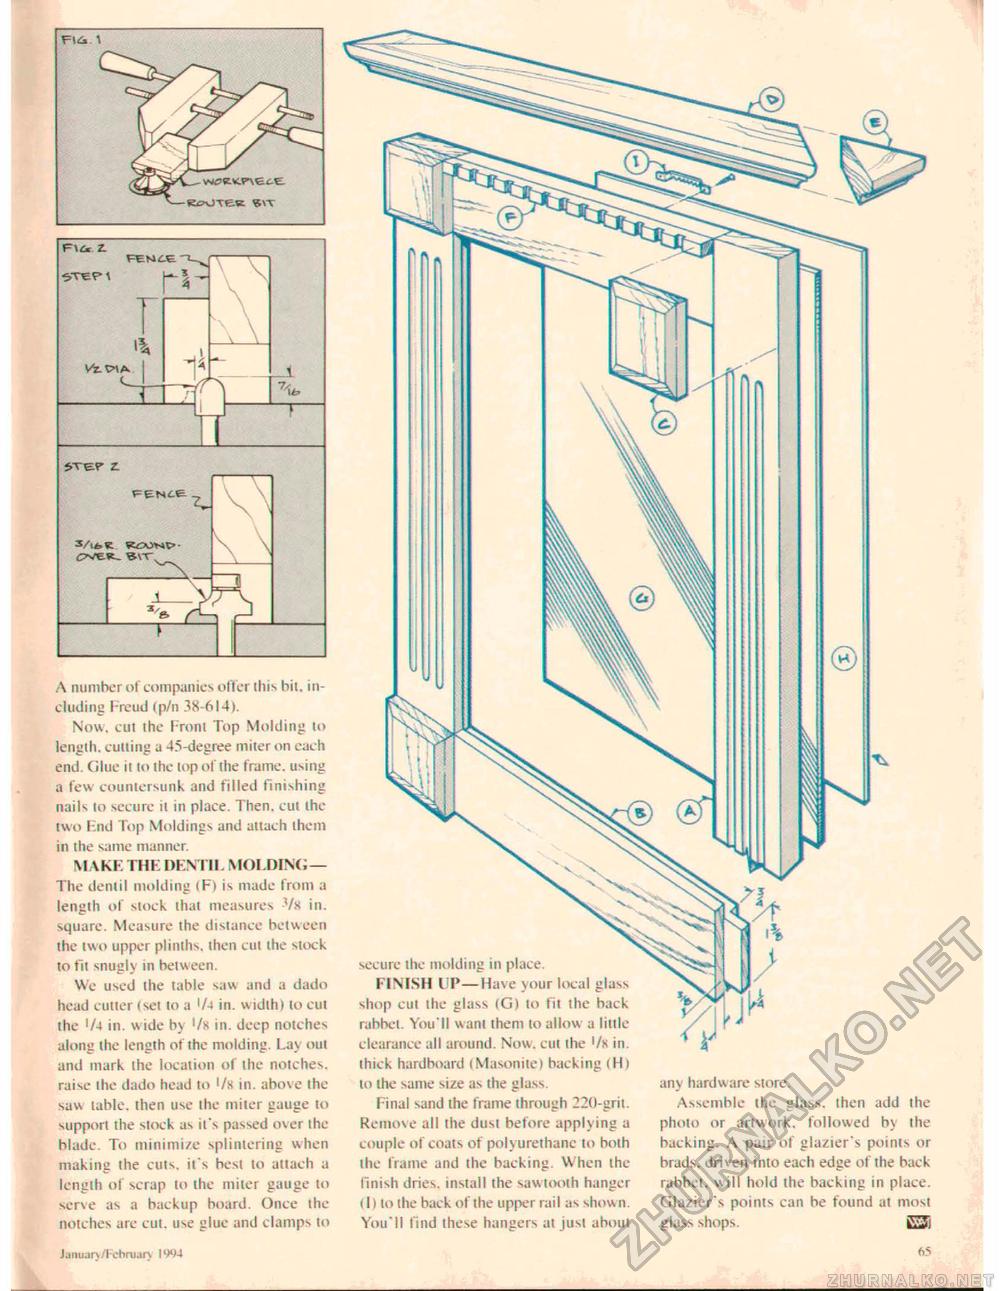
A number of companies otter this bit. including Freud (p/n 38-614). Now, cut the From Top Molding to length, cutting a 45-degree miter on each end. Glue ii to the top of the frame, using a few countersunk and filled finishing nails to secure it in place. Then, cut the two F.nd Top Moldings and attach them in the same manner. MAKE THE DENTIL MOLDING— The dentil molding (Fl is made from a length of slock that measures Vx in-square. Measure the distance between the two upper plinth-*, then cut the stock to tit snugly in between. Wc used the table saw and a dado head cutler (set to a 1/j in. width) to cut the '/4 in. wide by '/k in. deep notches along the length of the molding. La> oui and mark the location of the notches, raise the dado head to '/k in. above the saw lable. then use the miter gauge to support the stock as it's passed over the blade. To minimize splintering when making the cuts, it's best to attach a length of scrap to the miter gauge to serve as a backup board. Once ihe notches are cut. use glue and clamps lo JTEC z. F\<k Z. FEN6E any hardware store. Assemble the glass, then add the photo or ariwork, followed by the backing. A pair of glazier's points or brads, driven into each edge of the back rabbet, w ill hold the backing in place. Glazier's poinis can be found at most glass shops. E3i secure the molding in place. FINISH UP—Have your local glass shop cut the glass <G) to fit the back rabbet. You'll want them to allow a little clearance all around. Now. cut the '/s in. thick hardboard (Masonite) backing (Hi to the same size as the glass. Final sand the frame through 220-grit. Remove all the dust before applying a couple of coats of polyurethanc to both the frame and the backing. When the finish dries, install the sawtooth hanger 11) to the back of the upper rail as show n. You'll find these hangers at just about |


